Harmonize™ restorative case study
Dr. Simona Cuevas writes about how Harmonize by Kerr offers restorative dentists the ability to create durable and lifelike restorations.
Dr. Simona Cuevas discusses materials for direct restorative composite reconstruction
Restorative dentists continue to challenge science to develop new dental composite materials that satisfy growing and varying clinical concerns. Many composites on the market today seem to meet what clinicians may be looking for, yet they seem to always fall short in one aspect or another.
Harmonize™, a nanohybrid universal composite from Kerr, seems to check all the boxes. This material demonstrates superb esthetics that is reinforced by ease of placement, strength, and longevity. Harmonize is infused with Adaptive Response Technology™ (nanoparticle filler network) as well as rheological modifiers resulting in better blending capabilities, enhanced structural integrity, and exceptional strength. Direct restorative composite reconstruction relies first and most importantly on the material used, and secondly on the quality of the clinician’s esthetic artistry and technique. The development of the following restorations follow a standard composite placement procedure.
Anterior case
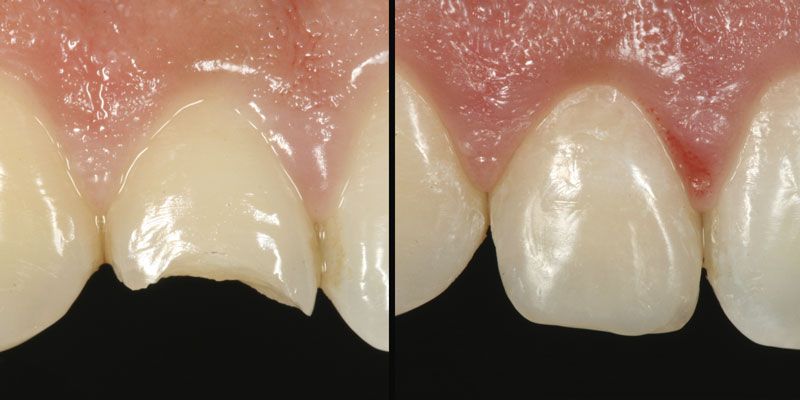
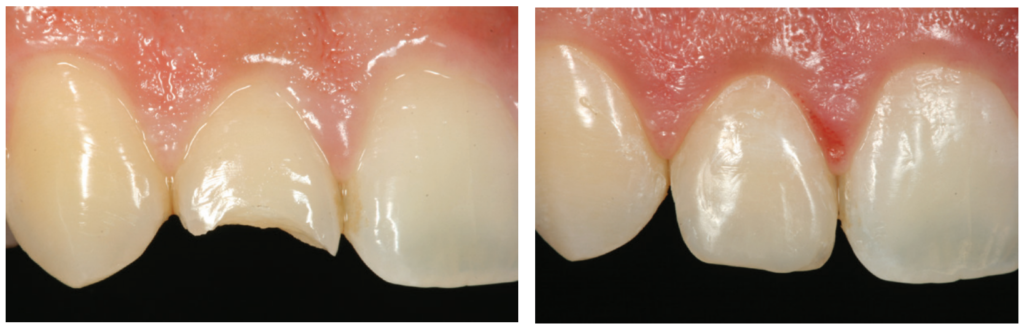
The patient presented with a traumatic fracture of tooth No. 7. Due to my approach to extremely conservative dentistry, no bevel was placed (I prefer butt-joint margins on all my composite restorations), the fracture was etched (total etch technique), and OptiBond™ Universal by Kerr was used as the bonding agent (following the manufacturer’s instructions for use). Harmonize composite was then placed in a dentin shade (A3) as the lingual shelf and cured. The enamel shade (A1) was then layered on top and light-cured. The restoration was polished with ProGloss™ one-step polishers (Figures 1A and 1B).
Posterior cases
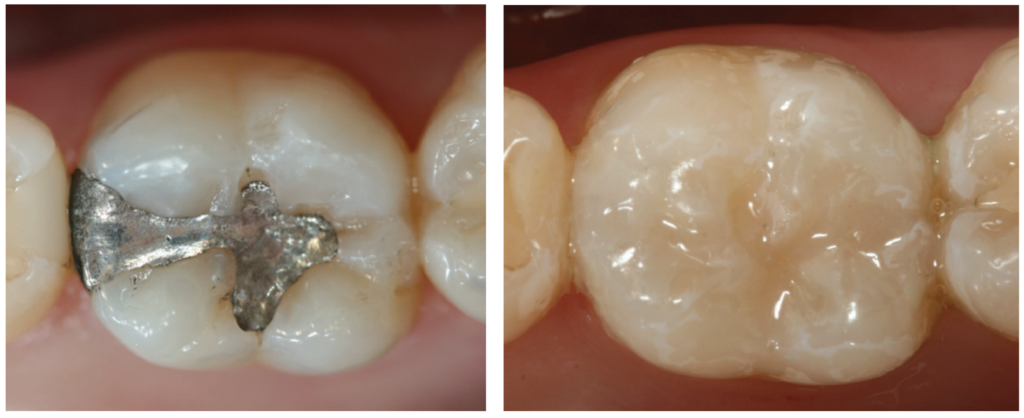
After amalgam removal, Harmonize composite was placed in a dentin shade (A3) as the lingual shelf and cured. The enamel shade (B2) was then layered on top, and posterior anatomy was sculpted prior to the final cure. After the final cure and occlusal adjustment, the composite was polished with a ProGloss polisher (Figures 2A and 2B).

After amalgam removal and composite placement (Dentin A4, Enamel D2) following the exact same steps as previously described, I found it necessary to place some color modifiers (Kolor + Plus™ — Ochre by Kerr) inside the primary and secondary anatomy grooves in order to match this restoration to the rest of the patient’s stained dentition. This extra step made the restoration indistinguishable from the surrounding natural dentition in the patient’s mouth. The staining was followed by polish with a ProGloss polisher (Figures 3A and 3B).
This composite can create restorations that blend in seamlessly with the other teeth and are virtually indistinguishable from natural dentition. The addition of this new composite to clinicians’ arsenal will allow them to quickly complete durable and life-like restorations.
Disclaimer: The opinions expressed in this (article) are those of Dr. Cuevas. Kerr is a medical device manufacturer and does not dispense medical advice. Clinicians should use their own professional judgement in treating their patients. All registered trademarks are property of their respective owners.
 Simona Cuevas, DDS, received her dental degree from the University of Texas, San Antonio in 1995 and is the founder and CEO of The Institute of Esthetic Dentistry.
Disclosure: Dr. Cuevas is a paid consultant of Kerr Corporation.